I guess this article could also be called “Topo Maps don’t change much” or “Being cheap as hell with new technology“. So I was digging through my old CD-ROMs looking at what could get tossed, recycled, and donated. While tons of old software was in the pile, one that stuck out was a copy of MapSource 2008 that my dad had given me when I first started navigating by GPS. Now almost 9 years removed from those original maps they’re not the most accurate things in the world, but they’re useful for navigating the broad swaths of public land I normally hunt and fish on. Most of the USGS Quads will tell you in the lower right hand corner when they were last updated, and you’re usually looking at the 1970’s or 1980’s. Anyhow, I ripped the CD-ROM to an ISO to save space and mounted it on my Windows 10 box to see whether I could install the 100K maps onto my Garmin Monterra. I wanted to see what it would take to shoe horn these old Topo Maps onto my modern Android Based GPS and if this was even worth doing.
Why even do this?
While I try to make custom maps of my hunting environments, it is extremely time consuming until I work out the kinks in some of my software scripts. Also, Garmin, OnXMaps, and others have started packaging some really cool hunting maps for each state, but they are priced as if they are AAA list video games. I’m not sure I need to pay 80 dollars for sattelite maps of Pennsylvania with Topo maps I already have. I may buy a state just to do a review for you guys, but I just can’t see the average hunter paying $80 for a map, especially for a place they intend on a DIY hunt maybe once. That’s the boat I might be in for a Colorado Elk hunt, so away we go!
Installation
Installation is simple, just fire up the installer from the CD-ROM, setup.exe. Click through Next a couple times selecting where you want to install Garmin Map Source.
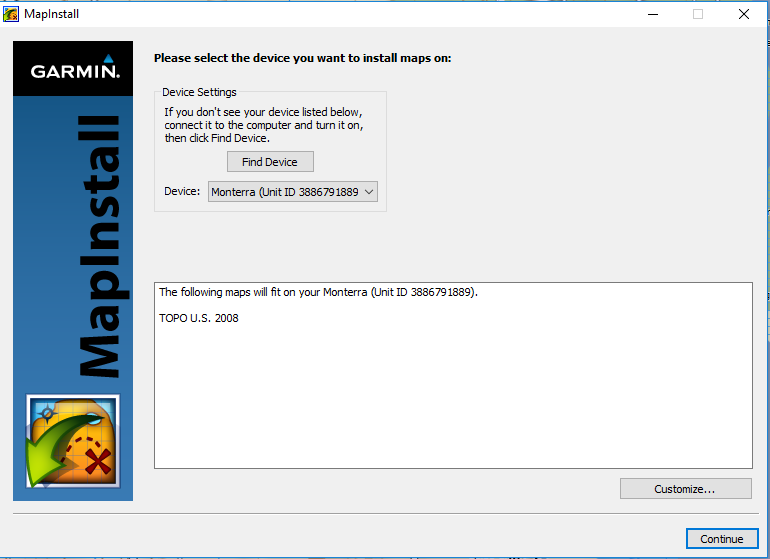
It turns out, after the install, you don’t need to do anything fancy. Install if you haven’t already Garmin BaseCamp and the map software will be recognized, and from there you can push it to your modern GPS. It’s really that simple. Install by going to Maps-> Install Maps on (Your Device). The wizard comes up asking you what device and what maps you would like to install. It’ll estimate the size of the maps to be installed and make sure that you have enough free space to continue. If your GPS is a Garmin brand, the internal storage will always be used until it is completely full for new maps. Then it will go to the additional SD Card or other storage medium.
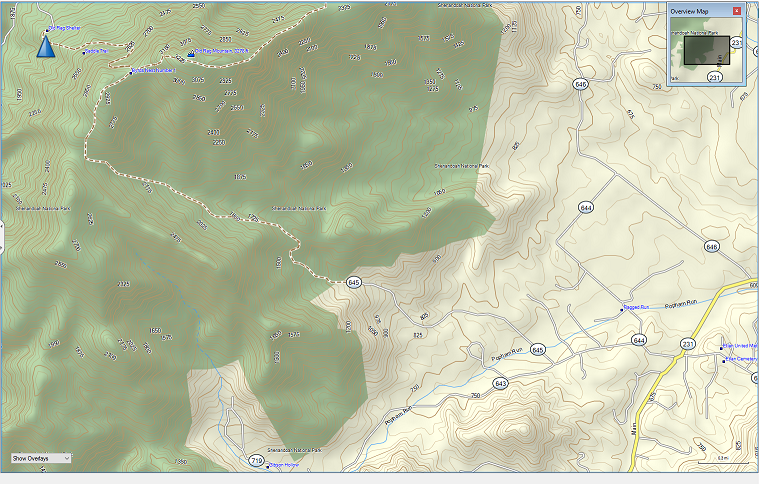
Here it is installed and visible inside of BaseCamp. In order for a GPS like a Garmin Monterra to recognize the maps you’ll need to reboot it.
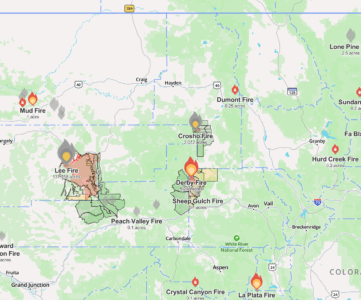
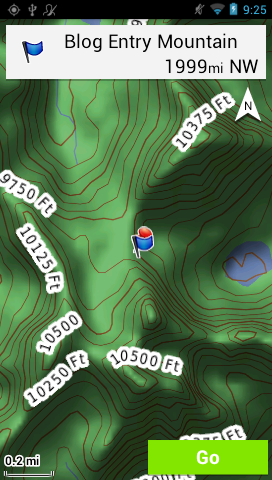
And here it is on your GPS! (okay, so it’s not the same terrain feature)
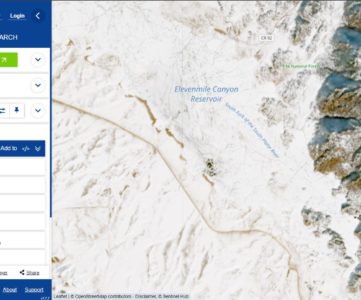
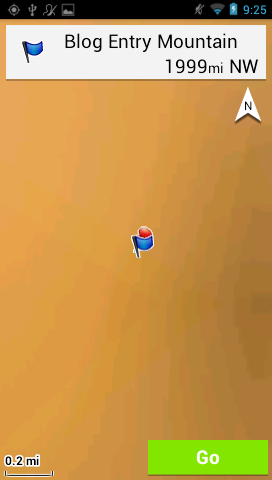
For reference, here is what the same terrain feature looks like on the base map the GPS comes with. Super detailed right? Makes you really aware of saddles and pinch points … where there might be water or transitions.
This way you can continue to use maps you’ve already purchased on your newer GPS. In the future I’ll be doing reviews on the newer map chips that are available for sale from Garmin, onXMaps, and others.