A few months ago I purchased a kayak lift in order to get my flotilla of roto-molded boats out of my way while I was working out in my back garage. A lift seemed like the best way to go since storing a kayak outside leaves it susceptible to UV rays making them brittle, the last thing you want as you’re going down a set of river rapids or coming in hot for a gravel beach landing. If you have the space I’d recommend building a PVC Kayak Holder, which we’d had set up in our smaller garage now for a couple of seasons. They do take up some serious room, but if you have two or three boats it makes more sense than just laying them on the floor.
The lifts run about $40 on Amazon shipped two day Prime to your door. But are they worth a damn? Honestly signs point to ‘no’, but it was the best way that I could get all the pieces I needed without going to a farm store like Tractor Supply Company and buying way over engineered hardware. The lag bolts affixing the header to the ceiling broke one of the heads off, the hooks let the kayak dangle significantly from the roof line, and the rope frays easily. The only things worth a darn seem to be the pulley and brake system. Here’s what I did to upgrade mine.
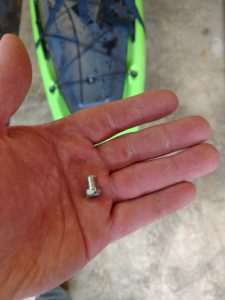
Well that’s distressing. A highly rated kayak lift from Amazon had the lag bolt head simply pop off after a week holding my 72lb Native Watercraft Slayer 14.5.
Build a header and replace your lag bolts
Look at the way your joists run in your ceiling in your garage or storage space. if they run perpendicular to the way that you want to hang your boat, attach a 2x4x10 to the roof, marking off each joist and affixing a lag bolt of at least 4 inches long. Basically take those lag bolts that come with the kit and immediately throw them out. They’re cheap and don’t take the torque required to get a 70 lb boat in the air. You’ll anchor the 2×4 into the joists on each one for a solid hold. Bear in mind that the pulleys themselves will be screwed into the header and joists, but there are two bolts per pulley system, meaning that only one can go straight through to the joist. Remember this as you pick the length of lag bolts you’re going to select, I chose a 4 inch bolt to get past the 2″ of the 2×4 (1.75″) plus the 1/4″ of drywall on the ceiling and into the joists for a solid anchor point.
Take the hooks off
These hooks and the yoke hang unnecessarily from the pulley body, while it gives some stand off distance to allow a pulley to be pulled entirely up to the top of its range it sacrifices a good 8 inches of head space.
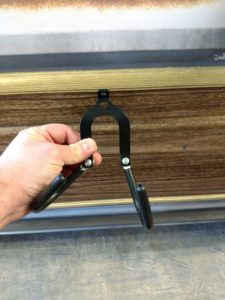
The hooks that ship with the kit are attached to a U-shaped yoke that drops the entire assembly something like three inches from the top of the pulley when it’s in the fully retracted position. You want your kayak as tight to the roof as you can since most garages don’t have tall vaulted ceilings. I tried replacing the hooks a couple of different times for things I thought would be more effective. Amazon reviews seem to indicate what several people do is drill out the rivet in the yoke that holds the two hooks on, and directly affix one hook to the base of the pulley. Unfortunately what that really does is put the load off center to the pulley, causing it to tilt. I then went to my local Tractor Supply Company and bought some fence braces, designed to hold two fence posts together for cyclone fencing. Unfortunately that doesn’t keep the strapping used to hold the hull of the boats positively on the hook. The last thing I need is one of our fairly expensive Wilderness Systems kayaks falling 6+ feet onto hard concrete.

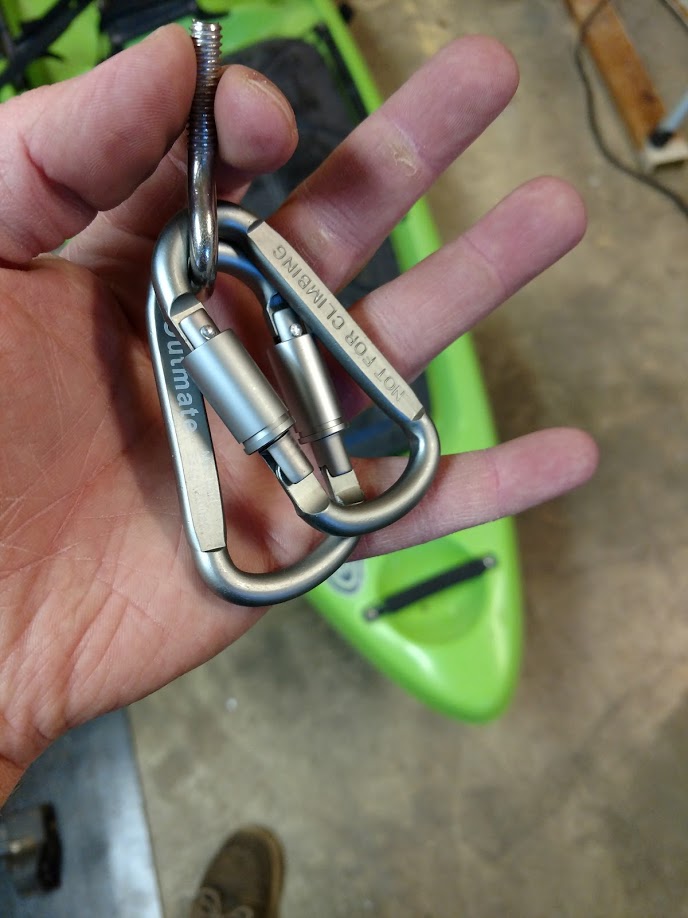
What I settled on after several trials and tribulations was to put an eyelet hook on each pulley base and to replace the hook with carabiners. This allows the straps to be positively held to the pulley system via the eye bolt and you can trim the overall distance that the boat hangs from the roof significantly. The eyelets in order to fit in the pulley provided by the kit are 2″ x 1/4″, with two stainless steel nuts and a washer each. Secure the eyelet by snugging both of the nuts toward each other, because of manufacturing tolerances, you might have to trim a little bit of length from your eyelet with a hacksaw, but it is unlikely.
If you swap out the straps that come with the kit with car tie downs that you likely use for your kayak you can get the minimum distance from kayak top to the ceiling.
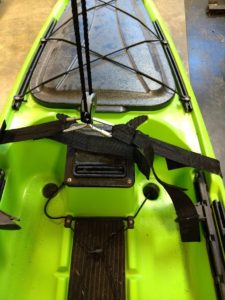
The setup shown above is good, but still leaves plenty of slack between the nylon strap and the top of the kayak since the straps that come with the kit are non-adjustable. They merely have 5 holes that are pre-sewn and reinforced.
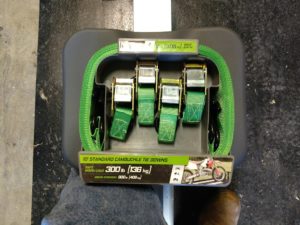
Simple car tie downs come to the rescue to bring infinite adjustment to the strapping system. You will have to be careful exactly how you attach the ends of the tie-down straps to the carabiners. Using just the hooks you’ll need to ensure that the tie downs are as tight as you can manage with the ratchet, or in the case of the ones I show above, the cam system. Center the carabiners on the cockpit of the kayak, and tighten the straps around the hull and you’ll get a feel for the new found adjustment in the system.
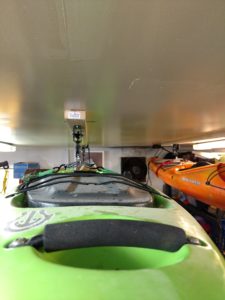
There you have it! I shaved several inches off the angle of the dangle… er… the height from the roof that the kayaks sat, while increasing adjustability in the system overall. Now I can easily walk underneath the kayak while wearing my work boots. For reference, I’m 5’10” and a standard ceiling height is 8′.
It is important to note that per the instructions on the pulley system itself, you shouldn’t store anything below it. I’m not sure that is a stellar recommendation for the system itself. With my improvements I feel better about the system safely holding my kayaks airborne and my wife is happy that the garage is less cluttered. Unfortunately my argument for a much larger work space or toy storage space was just not going to fly. Oh well, next house.